
AI Experiment Tracking
MLFlow Basics
Fairo provides users with a fully managed version of MLFlow. We keep our version in-sync with the latest version of the MLFlow repository ensuring our users always have access to the latest MLFlow features.
The main differences between Fairo's version of MLFlow and the open-source version include separating data by organization, handling authentication and permissions, and additional audit-log / version control features. These changes provide users with an enterprise-grade add ons while preserving the feel of the tool.
We run the server in tracking configuration highlighted here https://mlflow.org/docs/latest/tracking.html#common-setups. This means you can use our server for all tracking needs, and as attribute store.
Using our server as an attribute store is not required. You can configure the attribute store for your experiments in the MLFlow UI, or via CLI/library. Once configured, our servers will store your attribute location and all of your code will work off them. The default attribute location is on the Fairo servers, this is denoted with the mlflow-artifacts:/ path.
Using the MLflow UI
Using the MLFlowUI is as easy as logging into Fairo and clicking the MLFlow button in the bottom left hand side of the screen on the left hand navigation bar.

The UI is fully secured sitting behind Fairo's login and authentication layer. Everything that you can see and do will be based on your user-profile.
Using the MLFlow Library
To use the MLFlow library you will need to generate a Fairo API key. After you have generated a Fairo API key, you just need to add them to the environment in Python.
import os

os.environ["MLFLOW_TRACKING_USERNAME"] = "<api_key_id>"
os.environ["MLFLOW_TRACKING_PASSWORD"] = "<api_key_secret>"
At this point, assuming you made a personal access token, all of your work will be done under your user's identity. This means all permissions, actions, and so-on will be associated with your profile.
If you are using an organization wide-access key, all actions will be associated with a special profile associated with that key. BE CAREFUL. By default, organization API keys have admin privileges in MLFlow. It is up to your team to associate the appropriate access policies to ensure that the key is only able to be used as intended.
Set Up MLFlow Tracking
Now that your environment is set up, you are ready to begin tracking. Thanks to MLFlows auto-logging feature, MLflow Tracking is a breeze and works automatically with most machine learning libraries.
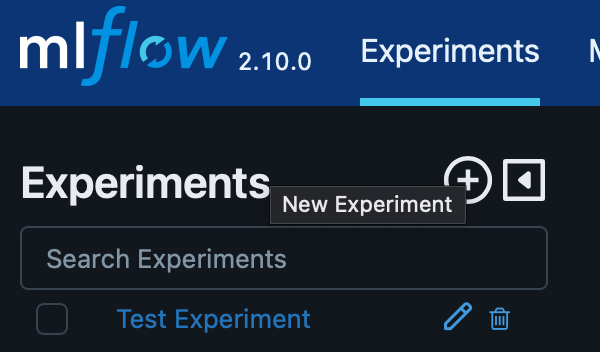
MLFlow groups runs by experiment. Generally, an experiment is a collection of runs with a particular theme or unique set of characteristics. To create an experiment, navigate to the experiments tab and select the "+" button.
Type the experiment name, and proceed in creation of the experiment. The experiment will have an ID associated with it, which will be immediately visible on the page of your newly created experiment.

Take this ID and add it to your tracking script (as seen on line 8). This will ensure that all of your runs with this script get logged associated with this experiment.
import mlflow
from sklearn.model_selection import train_test_split
# import MLFlow compatible libraries
from sklearn.datasets import load_diabetes
from sklearn.ensemble import RandomForestRegressor

# set the experiment id
mlflow.set_experiment(experiment_id="0cd27366-7c44-4e0d-88a1-8dac37dbc82a")

mlflow.autolog()
db = load_diabetes()

X_train, X_test, y_train, y_test = train_test_split(db.data, db.target)

# Create and train models.
rf = RandomForestRegressor(n_estimators=100, max_depth=6, max_features=3)
rf.fit(X_train, y_train)

# Use the model to make predictions
Track Prompt Engineering Experiments
Coming soon!
Make Predictions with Model
To make predictions with the model, we can use both flavors supported by MLFlow.
Predict on Spark DF
import mlflow
from pyspark.sql.functions import struct, col
logged_model = 'runs:/<run_id>/model'

# Load model as a Spark UDF.
loaded_model = mlflow.pyfunc.spark_udf(spark, model_uri=logged_model)

# Predict on a Spark DataFrame.
df.withColumn('predictions', loaded_model(struct(*map(col, df.columns))))
Predict on Pandas DF
import mlflow
logged_model = 'runs:/<run_id>/model'

# Load model as a PyFuncModel.
loaded_model = mlflow.pyfunc.load_model(logged_model)

# Predict on a Pandas DataFrame.
import pandas as pd
loaded_model.predict(pd.DataFrame(data))
Deploy Model Via API
Coming soon!
Updated over 1 year ago